Wednesday, December 14, 2016

Silly Wintertime Fun

I'm a weirdo about my bears, I admit it. There's just something about hugging a good teddy bear that just soaks up all your worries and frets. Because they provide such a helpful service, I express my thanks in silly gifts for them.

Hugh is a newer bear, but boy what a super bear he is. I found him at thrift (of course!) for only four dollars. I picked him up and was just putting him back down when he sighed unhappily. He has  a working "growler" inside him! After my initial surprise, I was delighted. It wasn't long before he became my couch buddy.

He has no tags, but he has a striking resemblance to a 1920's Steiff bear. With no button in his ear, it's hard to prove his pedigree, but his large size (24"), rare color, and outstanding condition including working growler make him quite a valuable bear to collectors. I just think he's a great guy, and don't really care about collector value.

I got him a little fisherman sweater and that was very cute on him, but a few days ago I decided what he really needed was some sleepwear. It's winter, and that means hibernation, right?  And because it was so quickly thought of, naturally I didn't take any in-process pictures. It was cold an rainy out and I was really just indulging in some "sewing therapy" to improve my mood. Anyway here's the results:


The nightshirt is blue striped cotton with pink binding on the edges. A little pearl button and a yarn loop make the neck closure.


Hugh's bathrobe is soft blue wool with a bit of grey and white twist yarn to make the piping and belt. His pocket holds a red and blue striped cotton handkerchief in case of sniffles.


The finishing touch is his Victorian-style smoking cap, made from a piece of wool leftover from the robe and a wide band of ribbon. A silver and pearl button and cotton floss tassel top it off with style.

Now all he needs is a tiny pipe and some reading glasses and he's all set to spend the winter season in comfort.

I'll have more things to share after the holidays when the recipients have gotten their gifts and I won't spoil anything by showing them here.  Until then, I hope your days are merry and bright, and all good things come your way!

Friday, October 28, 2016

Look at my chest!

There's this great little shop on our west side that sells building materials and fixtures pulled from old construction. If you want old kitchen cabinets to put in your garage for storage, if you're looking for a mid-century formica table, or if you need a moth-eaten, horsehair stuffed velvet Victorian fainting couch, there's a  good chance you'll find it there.

Guess who loves going there.

I'll give you three guesses.

Me, me, and ME.

It's where we found that terrific chandelier that we're so pleased about. We got our bathroom floor tile there. I got a complete socket wrench set for a dollar! And they always have some crazy thing that makes you tilt your head on one side and wonder where it came from, and where it'll end up -- like the twenty foot long marble bar from a hotel built in the 1890s. That thing was gorgeous. There was a note saying that a skunk had built a den in one of the cupboards at one time, which would explain the lingering aroma. It was only $500. I did a fair bit of covetous petting and cooing, but simply put, there's no place in our house that it would have fit, and of course we have no use for such a thing. It was pretty, though.

I've been poking around there, hoping a piano stool will show up that I can use with my treadle. No luck so far, but last week we did find something. And it was marked down a lot, which was a big treat.

We got a pretty waterfall-front cedar chest from the 1930s for only $25. Originally it was priced at $125, so we felt like we got a good deal.


Doesn't look like much, does it? But it's the perfect thing to put at the foot of our bed to hold spare sheets and blankets. Right now we're using a small wooden entryway bench that used to be our son's toybox. This is a nice upgrade. And it'll be even nicer once I've refinished it. 

It wasn't until we were loading it into the car and the bottom suddenly slid halfway out that we realized that part is a drawer! You can just see the two holes where a handle used to be. I ran a scrap of leather thong through it as a temporary handle. We were hoping to find a treasure map or envelope of valuable stock certificates taped to the underside, but no such luck. Alas! 

The veneer is pulling up but I'm sure a little wood glue and a warm iron will fix that. 


I was worried there was damage to the top because it was all rough and scratched, but nope, just the finish crackling and flaking off. I did some scrubbing with refinisher and you can see a difference already. Left side cleaned, and right side old and icky. I have very bright lighting in my workshop, so all the warm wood tones are washed out in my pictures, but I hope you can see what I do -- this cheap little secondhand chest is going to clean up very nicely.  


With the holidays coming up, I'm going be busy at work and a lot of my creative time is going to be spent working on super-secret gifts, so there may not be much to see here. I'll try to update as often as I can. Until then...

Stay tuned for more pictures of my chest!

Wednesday, October 19, 2016

Catch up! Catch up!

A month! It's been a month since I updated! Would it make you feel better if I said it was because I was so busy doing awesome things, and I had pretty pictures to show you? I thought so. Here we go.

First of all, Steamposium. We decided on a hunter/explorer theme for our outfits this year, and I'll admit there wasn't a lot of sewing involved with that; we mostly used clothing elements we already had, and I got two pith helmets at thrift. I made Dave a new cravat, though. I had the perfect scrap of fabric in my stash and he was very pleased with the result.

I needed a proper exploring skirt that would stand up to travel and hard wear, protecting me as I slashed my way through jungle trails and whatnot. Simple cotton duckcloth was the perfect stuff, and I was pleased to remember an old piece that I could rework. The original dress is kind of embarrassing now, but the fabric was spot-on and it's not like I was going to wear the lace-up canvas viking tent anywhere. All it took was cutting off the bodice area and making it the right skirt length. A simple waistband, belt loops, a few buttons (purely decorative) and kerblammers -- adventure skirt ahoy! I thought about putting some deep patch pockets on it, but then I'd load them up with things, and I'd look all lumpy.

I  have pretty jewels!


 Why is there a canary in a cage on my belt? I thought perhaps my traveler had a mistaken notion that birds could sense danger. Perhaps she had heard about birds being taken into mines (where they alerted workers of dangerous gas by, well, dying) but had not understood exactly what the birds did or why. I named my feathery companion "Caruso" and occasionally would lift his cage, peer at him closely, then announce "He's good. We're okay."

It would have been quite funny to have him wearing a tiny gas mask and with a sign tucked under his wing saying "You're fine!"

I know you're wondering about the blue wig, right? That... did not turn out well. Like, at all. No matter how many times I rinsed and rinsed, it still insisted on turning my forehead and hands blue when I put it on. I finally scrapped my idea for it and just did my hair in a kind of rolled ponytail tucked thingy. No pictures because it wasn't awesome and I didn't feel right about myself. I mean, I had a good time anyway, but next time I need to give myself more time for Plan B Hair, I guess.

But what had I planned to do with the blue wig? Well. I was thinking it could look sort of ocean-like, wavy and blue, right, and then I'd use a tiny wig I had to make an octopus to put on top like a bun.
Image result for octopus wig

I had the idea in my head, but I wasn't sure if it would work. Then I saw this picture online and was like Yes, I can do that!

So I took my little wig and dyed it fuschia, and a wooden spool seemed about right, with two buttons, to make octopus eyes.

The plan was going along just fine. It might not have looked exactly like the picture, thanks to my nascent hair styling skills, but it would have been all right, I think. But there was no dealing with the blue forehead and hands, not to mention it would probably transfer to my clothing and anything I leaned against (like Dave's shoulder) and oh, my neck and shoulders, too. Here's my start to an octopus, though. I've got his eyes set wrong, like a cat's. Oh well.


He looks kind of flat, compared to the inspiration picture. Well, this is how we create. Not everything works out.

So that was Steamposium and we had a great time and I ate too many gummi peach candies and Dave got invited to pose for a steampunk calendar and they'll be in touch. I was not invited to be in the calendar. I blame this on my lack of hairstyling skills and not having a fancy mustache like Dave does. So I guess I'm okay with that. Lip hair is just more hair to style, argh.

In other news, I finished -- or re-finished, as the case may be-- my treadle machine. The machine head is clean, and the cabinet is clean, with the old finish removed, and a new tung-oil finish rubbed in. She looks a treat! 


I was going to replace the knobs, as two are missing the ring pulls and one doesn't match at all, but then I decided they were part of her history and needed to stay with her. 


Shoot, I just looked at the time and I'm making myself late for work! I'll be back soon to tell you more about what I've been up to. 

Friday, September 16, 2016

Wigged out!

I spent my girlhood wearing holes in my Toughskins, not learning about hairdos, so I'm at a distinct disadvantage when it comes to making myself look fancy with curls and braids and those fluffy French-sounding hair roll things.

I once had my hair professionally worked into an updo for a wedding. I was more bobby-pin than hair when I left that shop. My simple-looking updo was actually a framework of pins strategically placed and a thick coating of hairspray to hold everything in place.  I dripped hairpins all night and I still managed to pull another 84 out of my hair that night back at the hotel. My hair is straight and fine and by golly, that's how it wants to stay!

But you guys, Steamposium is coming up.

Seattle's big steampunk event, host to just oodles of people who've lost hold of the handbrake on elaborate Victorian-esque fashion, with frills and ribbons and tulle, feathers and sequins and spangles -- outfits carefully constructed for maximum visual impact. And the hairstyles! Heaped up curls and all those other hair words I don't know because I was a tomboy. It's impressive to see!

And I have my day outfit, and it includes a terrific hat (and you will see it in another post so I'm not going to talk about it here except for this once) so I don't have to worry about doing anything dramatic with my hair. Ponytail or bun at the back, hat on, done.

But at night, there's the Masquerade Ball. And I wouldn't usually attend because it's so not my thing, dancing. But I found this great dress (which will be another part of that future post so I'm not gonna tell you more about it, either, except for this one thing) for $15 at thrift, and one thing led to another and suddenly I have to make difficult choices about the top of my head.

Adding to the difficulty are my Personal Standards About Steampunk Outfits:
1. No useless gears and cogs
2. No corsets
3. No goggles
4. No fascinators (those wee little tophats or bits of fluff that end up on women's heads as decoration)

Why? Because everyone has those things. They are ubiquitous and typical and show a tremendous lack of imagination.

But because I shun miniature hats, and I lack basic hairstyle skills, my fine, straight hair runs a tremendous risk of ruining the elegant look of my evening attire.

What's all this leading to?

WIGS.

There were bunches on display at the thrift shop (Halloween is coming) and I suddenly realized I could just buy fancy hair. I could get any length I wanted, any style, any color..!  So I looked at the wigs and quickly realized that they were crap.

Man am I fussy.

But seriously, they were like twenty dollars and sparse -- there was nothing to them! I knew if I got one, I'd be trailing bits of shed plastic hair and it would look wrong and not at all elegant like I want. Alas!

Then in one of the back bins I found an actual wig, a real one, like you'd buy in stylist shop and it was four dollars. And it was pink, but that didn't scare me.


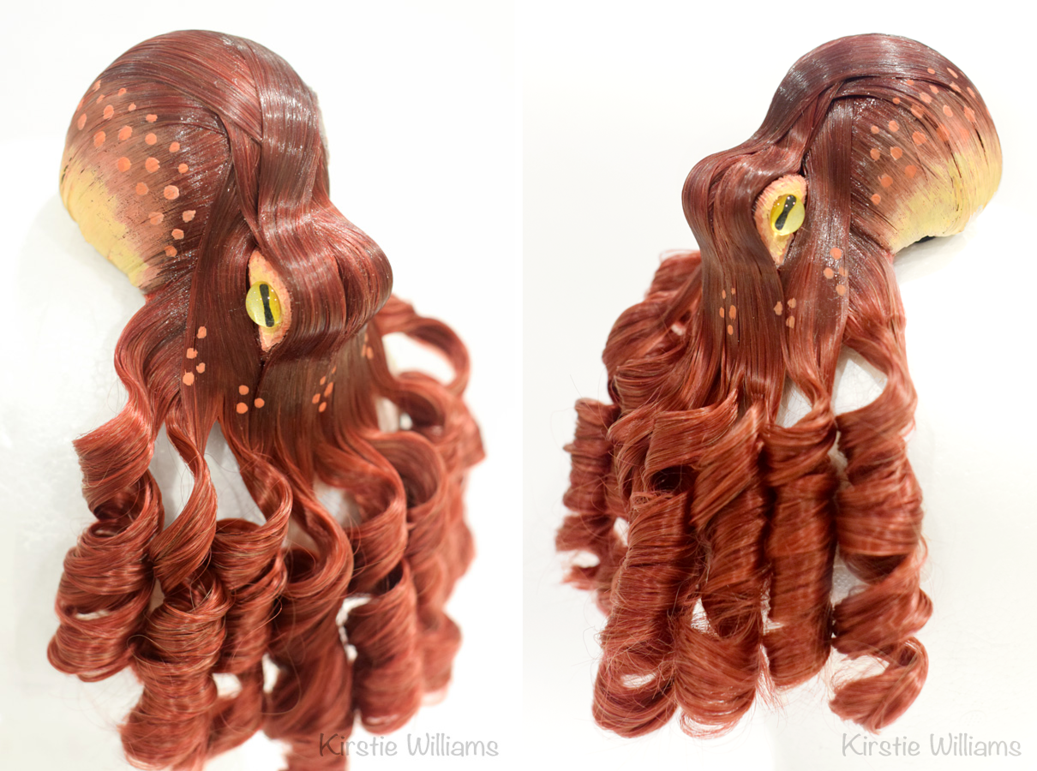
I didn't get a picture beforehand (of course) but this picture I found online is excruciatingly close.
So I bought it and went home to see how it looked.

Well, awful.

Who looks good in pale pink hair? Super pale waifs like the plastic lady in the picture, I guess -- but not me. I looked ... well, let's not linger. It just wasn't a good look on me. Pink, oof. But that's why there's hair dye, my friends! Except a quick internet search assured me that hair dye does not work on wigs (unless they are human hair, which this is not) so I'd have to find another way.

Know what I found? Alcohol ink. Scrapbookers apparently use it for ... something. It comes in brilliant shades, works fast, and stains like the dickens! And I found an online tutorial that showed how you could put it all in a ziploc bag and squish it up.  So that looked nice and tidy and doable, and let's not lie -- fun.


I bought a three pack of colors from Ranger/Adirondack Inks because it's what I could find, and used the one called "Stream" which is a nice ocean-y looking blue (which is important, but you'll find out why later on). I put the whole dang bottle of it (half an ounce!) into a plastic bag with maybe a quarter cup of water, tossed in the pink wing, and got to squishing.


See how none of it is on my hands? See how my utility sink is still marbled grey and white? Yeah. That won't last.

In the tutorial, they advise leaving it for what, five or ten minutes? I let this thing stew for half an hour, squeezing and squashing it every few minutes to make sure everything was getting dye to it.


Results! The whole thing doesn't look terrible, and I don't mind the variations in tone, but I'd like the color overall to be more vivid. So tomorrow I'll go buy another bottle of ink and spray it on, full strength. Then I can style it and add the decoration -- which will be in that upcoming post I keep promising -- and if everything goes according to plan, I'll have a terrific hairdo for the ball!

Stay tuned!


Wednesday, August 24, 2016

Julia's Cabinet

The machine has been renamed "Julia" after it's original owner. This is the sort of thing you can do when you have people at the estate sale that can give further provenance when you go back and pester them.

A lot of folks online at various treadle collector sites recommend using Howard's Restor-A-Finish to give an old wood cabinet a boost. The claim is that the stuff is a mild solvent and it softens the finish so it will spread around and fill in cracks, take out water rings, dullness, etc , and maybe on something less damaged, it does that. I got some at the hardware store and gave it a try, but the results were disappointing. Actually, I didn't see any difference at all. I'm sure I'll find a use for it eventually so it's going into my paint stash for now. Then it was back to the shop for some stripper specially made for antique finishes.

Gloves and fine steel wool and scrubbing away over a century of dirty, discolored, cracked and crazed shellac-- this is what I call a good time! I love doing a project where the improvement is so quick and obvious, with a great result.

So, just as a reminder: here's the sewing cabinet top before...


And here it is after stripping.


It's so light!  Along the left edge of the top piece, the veneer has been damaged and chunks are missing, so it looks a kind of rough. I've read that filling it in with Plastic Wood or a similar product works, but I can't believe it would look nice. I'm thinking I'll just sand down the rough patch and leave it at that. At 144 years of age, she's going to have some scars and around here we call that authenticity.  And see in the lower right hand corner there, there's a dotty discolored ring? It won't come up with stripper. I'm not sure what it's from, but all I know is, that's where I'd set a cup of coffee while sewing. Heat damage? Perhaps.

I'm itching to rub some oil into the clean wood, but I'm holding off until I get the whole thing stripped. One thing at a time! Originally, I planned to just do the top and sewing surface, but the results are so dramatically lighter that it would look very strange, so it looks like I'm going forward with the whole piece.


Light top, dark body. See? It would be weird. But I'm excited to see the beauty emerge, so it will be worth the extra work.


Side of one of the drawers. This is what I mean by a "cracked and crazed" finish. Some restorers call this "alligator skin". After years of the wood expanding and contracting in heat and cold and damp conditions, the shellac breaks up. In some places, it flakes off if you rub it. Yeah,  I couldn't leave her like this. 


That carving is beautiful! It's hard to get in all the nooks and crannies to get all the old finish off, so I'm just doing the best I can with a toothbrush and my steel wool and leaving whatever is stubbornly resistant. The shellac comes up, but the darker color stays, and I"m okay with that. It adds dimension, and also 144 years, authenticity, etc. 

Okay, I gotta head to work. Stay tuned in the following weeks to see more of Julia and her cabinet. Then the sewing projects start!

Sunday, August 21, 2016

Treadle Machine Magic!

I love a good estate sale, and I'm even happier when it takes place in a house that I've always been curious to see the inside of. Our next door neighbor has been living in her home since the 1930s, and recently she decided to live with her daughter, so they held a huge estate sale and I got to go into the house and snoop around. It was a cute place, and nothing had been updated since forever, unfortunate decorating decisions and all. Coved doorways. Tall baseboards. Flocked wallpaper in pale blue. And the tiniest rooms ever. It was like a little playhouse, but for living in. I wanted to buy it and make it my new fort. As it's right next door, it couldn't be handier, and then all my sewing stuff and horse things would be out of Dave's way. I told Dave we should buy it and join the two houses with a breezeway, but he said no. So much for my architectural plans. Alas! 

But there was one thing I wanted for my own, so I did a little bargaining and came away with this little beauty. I call her Julia after her original owner. Julia is a New Home treadle sewing machine, and according to her serial number plate, she was built in 1882. She's seen some serious use, but she has been reasonably maintained and still runs very nicely. 


She needs a serious clean. There is a grimy layer of oil, dust, and dirt on her that has built up over the years. Some things get dirty from being handled and used, and some get dirty from sitting and attracting dust. Julia has both in spades. Today is her spa day.

I've removed her from her cabinet. She's resting on an old bathroom rug with a shower curtain over it to catch drips. I'm using a cleaner that gently melts away grime and oil but won't harm the decal decorations or finish. What is this amazing substance? Gojo. It's a hand cleaner used by mechanics, but after seeing how well it works here, I'm going to be using it a lot more on parts and stuff. (If you buy some, be sure you get the kind without pumice.)  EDIT: I've since learned that Gojo sometimes will damage the gold parts of the decals, leaving them silver-ish. A better cleaning recommendation is to use sewing machine oil to soften and lift grime. It won't damage anything.)

So here are Julia's before pictures.


I thought the floral scrollwork had mostly worn off, and that's why it was only dimly visible. 


I applied the Gojo with a one-inch paintbrush and let it sit for about twenty minutes. The stuff starts out as kind of a wobbly, custard-like cream but after it's applied, it melts like butter. In the areas where the grime was thickest, it would turn brown and puddle up. I'd wipe the goo away with a towel and reapply fresh Gojo. If a spot was particularly grungy, I'd gently scrub at it with a soft toothbrush. Here's Julia all gooped up with Gojo.


Turns out the decal decorations weren't that worn at all (except in the stitching area, where they'd seen the most wear during sewing), and the Gojo melted away the grim to reveal beautiful colors and swirls I had no idea were there! 


Look at her! Isn't she pretty? In some spots, especially near the little holes where you oil the works, there was a darker patina, and I decided to leave that rather than try to scrub it away with anything stronger and possibly damage the decals. After all, we can't expect her to look brand new at 144 years old. 


Now that the machine itself is all clean, I'll re-oil it and set it aside while I work on the cabinet. That's going to be another post, so you can look forward to that, but here's a picture of what we're starting off with. Yup, it's pretty rough. But I'm hoping there's going to be a dandy "after" picture when I'm done!


Wednesday, August 17, 2016

Buckaroo Stuff

My riding has taken a classic turn lately. I am working to train my horse (with the help of a very experienced teacher) to be a finished bridle horse. This takes careful handling, lots of work, a good amount of time, and also rekindles long-ago ten-year-old me's fantasies of becoming a cowboy.

And if you're going to take the ride, you gotta have the look, right?

First stop, the shirt. I got a pattern on sale a while back, and I was delighted to find it in my stash. Buckaroo Bobbins, by Simplicity, with a pattern for a shirt, vest, and coat. Don't care about the coat, but the shirt and vest were just what I wanted. Plus I'd found three yards of natural-tone shirt weight linen at the thrift shop for three bucks that would be perfect to make it.


It's an easy pattern: front, back, two sleeves, cuffs, yoke, and collar. I hand stitched it, of course, so it took a few nights with the buttonholes being a cussing struggle as always. I really should practice those more often so I get good at them. As it is, I'm glad they're mostly hidden by the buttons. Hand sewing a project when the instructions are written for machine sewing is always a bit of a trick. The plan for attaching the neck and collar was very convoluted. I was able to do it, but the whole time I was thinking how I'd do it differently next time and it would be much easier.  I got a small jar of buttons at thrift for two bucks that was a real bargain because they were old and made from natural shell, not plastic. So my shirt has beautiful carved shell buttons that have that warm pearly glow.


The collar points are a little damp because I had made some sewing marks there that had to be dabbed away. I've got some red-brown wool that's going to be the vest, but I haven't started that yet.

While digging through the patterns, I found one for gloves and thought I'd give that a shot. I had some scraps of pigskin I could use, so I cut out the pieces and set to work with a special leather gloving needle and some sinew. I used a fancy stitch to make it especially cool, and while it turned out, it was so much work that I decided I'd not make the other one. I may try again sometimes with a thinner leather to make a dress glove instead of a heavy work one, but dang, that's just a lot of hard pushing with the needle, and store-bought gloves are not that expensive.


I bought some new spurs for myself and decided that some fancy straps were in order. I chose a style called "dovewing" that looked attractive, and designed a stamping pattern similar to a pair of straps made in Miles City back in the 1800s. Here's my trial one after being cut and stamped, but not dyed yet. The size was fine, but after trying it on, I decided I didn't like the shape as much as I thought I would.


So I made some more traditional buckle straps that were narrower, and still managed to incorporate the flower design in the center. Here they are, all done. I wore them riding that night and felt pretty sharp.


So you can see I'm still busy as ever, making stuff. I'm just not so likely to be at the computer writing about it! And now I gotta head to work, and there's two horses waiting for me to ride them tonight, so I'll see y'all later. Happy Trails!

Monday, July 4, 2016

I promise I'm not dead.

I know, I know -- it's been a while. Things have been busy and all the usual excuses. But I am still making stuff, honest, and when I come back from vacation next week, I'll make time to write a post to update y'all on my recent activities. Til then, a little peek at some leatherworking stuff I've done in the last week or so:


A simple cuff bracelet for a small gift exchange...


And an experiment in braiding around a core with eight strands-- a new skill which isn't as difficult as I thought it would be!

When I come back, I'm sure to have lots to show you, and we can celebrate five years of "Wenny Makes It!"

See you after vacation! 

Friday, April 29, 2016

Back in the Saddle, Again.

Ahhh, springtime. When a young girl's fancy turns to thoughts of --saddles?

Yep. At least, if that girl is me. I've spent the last two months working my tushy off, and the only way I managed to get through it without losing my happy smile is I promised myself a really nice treat at the end of it all. I had a certain dollar amount in mind, and then a generous tip became involved, so I kinda splurged a little and got myself a sweet vintage Bona Allen saddle that was at the secondhand tack shop. I dickered them down on the price. You know how you look at a price and then counter with something super low, knowing they won't take it and then you can always go up a little? Well, they took it, right off! Guess this old-fashioned rig had been hanging around for a while and the seller was happy to have an offer.


I can't quite decode the serial number, but this saddle was made somewhere between 1963 and 1974. I'm leaning more towards '74 because the style is very like my '79 Circle Y. Saddlemaking goes through trends just like any other fashion, and like bell bottom jeans, this one just has that 70's vibe.

It's in very nice shape, so all it really needs is a good clean and condition (done!) and some detail work. Like that silver spiral lacing along the edges -- that's damaged in some spots, so I've ordered new and will replace it where needed. You can't see it well in the picture, but the lacing goes all down the back edge of the fenders (the leg parts between seat and stirrup). I've never seen a saddle with that before. That's where it's in the worst condition, so once that's fixed, it'll look proper dazzling!

Someone had put on a nylon seatbelt-like material latigo and off-billet. (The things that hold the cinch in place to keep the saddle on the horse when riding.) I see a lot of folks using these, and they're perfectly safe, I'm sure, but I personally don't care for the look. I had a leather latigo on hand, and making an off-billet was easy: just two layers of leather stitched together with a few holes punched in. The stitching takes a while because I do it by hand. It's not difficult, but it's tedious. I watched tv. This took up the season opener of Game of Thrones and all of Jurassic World.


I didn't want to have to switch over all my accessories every time I need to change saddles, so I needed a breastcollar to go with this saddle as well. I had an old tatty fleece-lined one that I got in a box of stuff at a yard sale. It was so nasty; the fleece was hard and full of dirt, and nothing I did seemed to help. Just picking it up made a dry dirty dustcloud puff up. *cough cough* I cut the stitches and tore off the fleece. 


I thought replacing it with new stuff, but fleece absorbs a lot of sweat, and takes a while to dry. Once wet, it keeps moisture on the leather, so even washing is a problem -- especially in a humid place like the Pacific Northwest where tackroom dampness is a constant battle. But I couldn't leave it with the rough side exposed, or it would chafe the horse. A smooth leather lining was the answer. After cleaning and conditioning, I laid it out and used it as a pattern to cut new lining pieces. More stitching for me! 


Once I get this all sewed on and dyed to match, I'll remake the center medallion and it'll be ready to ride. 

Tuesday, April 12, 2016

Not-So-Creepy Baby.

There's a saying, "Never apologize for your art." And I think I'm going to lead with that because from the reactions I've gotten so far, my latest project is a little controversial. A lot of people find these dolls creepy.

I'm not sorry I made it. Not one bit. It turned out beautifully, and it's a gift for a good friend who will enjoy it; anyone else's opinion does not matter. She told me a while back that she wanted a reborn baby doll -- one of those ones that artists make look like a real baby. I've been keeping an eye out for one at my usual sources with little success (at least, not at an affordable price) and suddenly it hit me: I have skills. Maybe I could make one myself. I mean, it's worth a try. I can do things. I looked up some how-to videos on YouTube and got a little creeped out but not dissuaded. I decided to give it a shot. 

So without further ado, let's meet the primary materials: 


Okay, this is a vinyl baby doll made by Berjusa. I got it from an online auction at a very nice price because -- well, look at it. That baby has seen some serious playtime. It was soiled, the stitching had several mends, and it was stuffed with chunks of foam that made me wonder what they'd been soaking up over the years. My first order of business was to detach the limbs and head, empty the stuffing into the trash, and carefully take apart the pieces of the body so I could use them as a pattern to make a new one. 


Top: icky unwashed baby arm. Bottom: baby arm freshly scrubbed with baking soda and peppermint soap. What a difference! 

After scrubbing, the baby's skin tone was a little orange-y. I needed to neutralize some of that orange to give it a more natural appearance. I read a lot of online tips about painting the insides of the limbs with lavender paint, but what I ended up doing -- and what worked really well! -- was using blue tinted hair dye. I started out putting just a tiny bit in lots of water and pouring it into the parts, but I soon realized a faster, better way was to just dunk the parts right in. count to five, rinse, and bam -- no more orange. 


The kitchen table gets lots of natural light. Perfect place to work - and Dave was gone to Emerald City Comic Con, so I didn't have any interruptions like horrified screaming.


Here's the clean, neutralized head. I'm glad that the eyes are shut, because painting something that watches me would be a bit unsettling.

I used acrylic paints, sponges, and a big fluffy brush to put some more lifelike color on the vinyl parts. I could go into details, but a girl's gotta have some secrets and if you just google "diy reborn doll" you'll see all the same videos I did and know what to do. 


And here's the head after painting to a more natural-looking (hopefully) mottled flesh appearance. I think I did a pretty good job. If it weren't for that plastic stick coming out of the neck, I'd think this was a picture of a real baby.

Okay, that binky? Magnets. Super-strong magnets. You cut off the rubber sucky part of the binky and glue one magnet there, and then you put some glue on another magnet and drop it in the baby's head. Hold the binky where you want it, and the magnet in the head will attach itself to the proper place inside. Then just let it sit for a day so the glue can cure, and you have a cute accessory. If I'd have been thinking fast, I'd have put a magnet in the baby's hand, too, so it would look like it was sucking its fist. 

But it was too late for fist-magnets, because the arms and legs were full of pale tan aquarium gravel. 


I just used a kitchen funnel to dump it in there, and then glued circles of cardboard over the openings. That duct tape you see is just holding the cardboard in place til the glue dries. Gives the pieces a nice realistic weight and solidity. 

These arms and legs had been sewn to the cloth body. Usually there is a thin ridge for zipties, but not for this doll. I had to sew them to the new body. 


For the body I cut pieces from a pale tan oxford cloth shirt. Strong and lightweight, just perfect. I stitched the arms and legs using the same stitching holes, adding a touch of glue to the inside hems for extra strength. 

I used a bag of marbles to add weight to the baby's body. To keep the marbles quiet, I stitched long tubes of fleece fabric. I'd drop in a marble, tie it with a piece of thread, drop in another marble, tie it off, and so on. I ended up with a long, intestinal-looking rope that was soft and heavy and didn't rattle or clink one bit. Perfect! I coiled it inside the baby's body and then padded around it with polyfill stuffing. A sock full of gravel and more polyfill cushioning went into the head, giving the baby a total weight of about six pounds. 

A trip to the thrift shop later, I had a gender-neutral sleeper suit, a cute ducky hat, and a blanket. I puffed a tiny amount of baby powder onto the body to give the doll just the right scent, dressed it all up, and it's all ready to go to my friend for her birthday. 


I hope she likes it. It was something different and interesting to make, and I have to admit that buying baby stuff was fun. Everything was so cute and tiny! And not a bit creepy.